Main settings
Project Builder Module
Before a project is realized it needs to be properly configured. This is done through the Project Builder module.
In general, there are three ways to get to the Project Builder module and configure the project:
- You are redirected to the module after you create or clone a project - covered in details in the relevant section of the documentation.
- For an existing project you can get to the module from the Dashboards page:
- Option 1:
- Open the main Dashboards page.
- Find the project, that you want in the projects' list.
- Click on the Project builder button at the far right in the project's row.
- You're redirected to the project builder module from where you can proceed with the setup.
- Option 2:
- Open the main Dashboards page.
- Find the project, that you want, in the projects' list.
- Click on the three dots at the far right in the project's row.
- Once the button is clicked, a dropdown menu appears.
- Select the Project builder option.
- You're redirected to the project builder module from where you can proceed with the setup.
- Option 1:
The module itself is split into four different sections:
- Main Settings;
- Sample Sources;
- Questions;
- Quotas;
In here we'll cover the first section, and we'll go through the rest in the following articles.
Main Settings
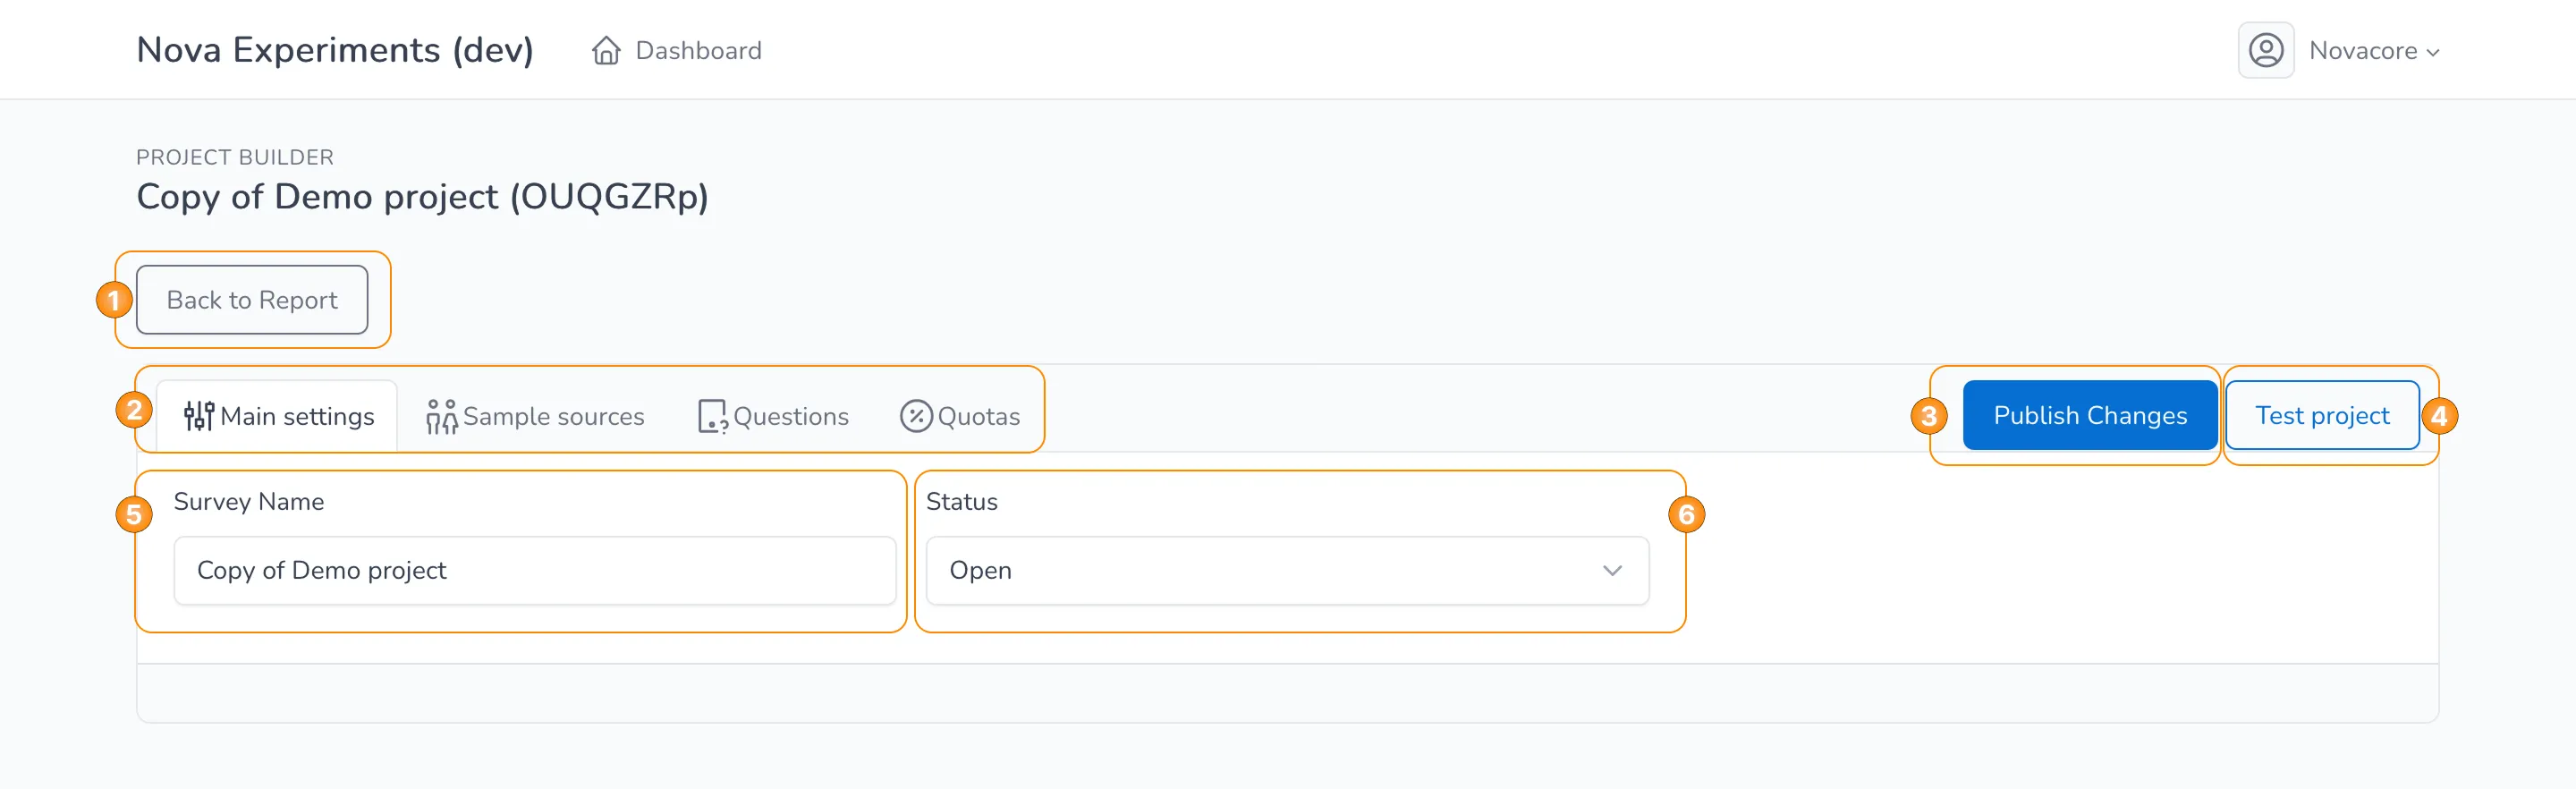
From the Main Settings section you can adjust the project's name and the project's status.
There are two possible statuses - open or closed, based on the fact if the case study is still active or not. The statuses are manually adjusted by the user.
Otherwise, the interactive elements on the page are the following:
- Button to go back to the Project Report page, described in details in the respective section of the documentation.
- Tab menu to choose the desired section of the Project Builder module.
- Button to publish any changes that were done to the project.
- Button that opens the project in testing mode, described in details in the respective article.
- Field to set the name of the project.
- Field to set the status of the project.
You must click on the Publish Changes button before moving to another page in order for any changes to be saved.